Search This Blog

Friday, October 3, 2014

Been a while since I posted LOTR stuff here, but I am getting the itch again...

I am nearing the end of the current cycle in my Star Wars RPG, and will need to put together the next phase of the adventure.  While I am doing that I may run Cubicle 7's The One Ring RPG for my group. 

The One Ring Roleplaying Game

Smaug has been defeated, the Battle of Five Armies has been won, and Bilbo has returned to the Shire. But much danger still remains, and from the Orc-holds of the mountains to the dark and corrupt depths of Mirkwood a darkness waits, recovering its strength, laying its plans, and slowly extending its shadow…

NEW TOR packshot2
The One Ring Roleplaying Game is based on J.R.R. Tolkien’s The Hobbit and The Lord of the Rings. Chock full of incredible artwork by leading artists, including John Howe and Jon Hodgson, and with evocative rules designed by award-winning games designer Francesco Nepitello, there has never been a Lord of the Rings game that’s more evocative of Tolkien’s unique vision. Along with rich and detailed background information, rules that focus on Tolkien’s themes, character types unique to the world and a setting that changes as the Tale of Years progresses, when you play The One Ring Roleplaying Game you really feel like you are playing in Middle-earth.

The Setting

Middle-earth is a huge place, stretching thousands of miles from the Lonely Mountain in the north to Far Harad in the south, and beyond. It’s an ancient land too, with a richly detailed history going back thousands of years to the dawn of the First Age.

But The One Ring Roleplaying Game is set in a very particular place, in a very specific time: Wilderland, 5 years after the Battle of Five Armies. Wilderland is at once familiar to fans of the novels, as it's the region both Thorin’s Company and the Fellowship (once broken) traverse on their journeys.

This land is filled with instantly recognisable locations from the novels: Mirkwood, Thranduil’s Halls, Lake-town, Erebor, the Lonely Mountain, Dol Guldur. All are locations ripe for exploration and adventure. Its also home to some of the best-loved characters from the novels too, from Radagast the Brown and the Elvenking Thranduil to King Bard of Dale and King Dáin of Erebor.
You can find out more about the setting here.

Laketown

The Game

Games of The One Ring are split into two phases: the Adventuring phase and the Fellowship phase. In an Adventuring phase, a company of adventurers heads off from their homes and into the Wild, in search of adventure; whereas the Fellowship phase provides heroes with the opportunity to rest and recuperate, to practise their skills or pursue a noble undertaking.

The One Ring Roleplaying Game uses a special set of dice: the twelve-sided Feat die, which is marked with numbers 1-10, as well as two special symbols, Gandalf’s rune and the Eye of Sauron, and a six-sided Success die, which is numbered 1-6, with a Tengwar rune on the 6.

TORdice
 
These dice are available to buy separately in all stores where The One Ring is sold or from the Cubicle 7 web store, or you can just use a regular d12 (counting 11 as the Eye of Sauron and 12 as Gandal's rune) and some d6s.

When you make a roll, you roll the Feat die plus a number of Success dice equal to the skill you’re using, add up all the numbers shown and compare it to the Target Number of the action (typically 14).
To find out more about the game’s mechanics, check out this post here. You can find out more about the Adventuring phase here and the Fellowship phase here.


I am really thinking of doing this, especially since the Rivendell PDF is now available, and I will be able to have High Elven and Dunedain characters for the group.

This setting supplement will take your adventures west across the Misty Mountains to the Last Homely House, expanding play into eastern Eriador, covering not only Rivendell itself, but Angmar, Fornost, Mount Gram, Tharbad and everywhere in between.

There are also rules for creating your own Magical Treasure; playing Rangers of the North and High Elves of Rivendell; turning the baleful Eye of Mordor on your company; and facing more powerful adversaries than ever before.


 Plus, it will allow me to continue the adventures of Armegil of Nan Giliath, and the Guardians of Imladris, but with official rules from Cubicle 7.


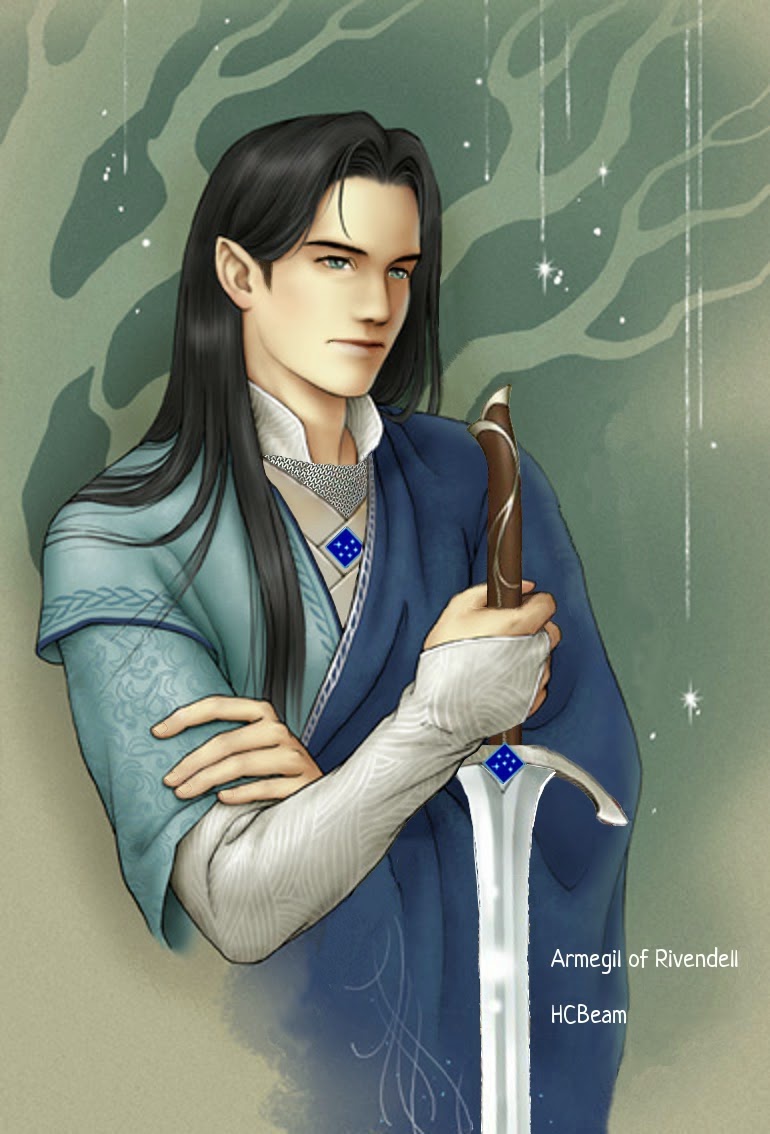
Prior to Rivendell being published, I had put together my own High Elf Heroic Culture using the Elves of Mirkwood Heroic Culture from the First Edition of TOR as a starting point.

For those interested, those rules are here:


https://dl.dropboxusercontent.com/u/539 ... 0Elves.pdf

Saturday, September 6, 2014

More picture of the Nebulon B.  This time with the custom stand put together for me by my friend Silent Jim.  The stand is made with brass rod, wood disks, and acrylic sheet plastic.  You can click on the photos for full sized versions of the pictures:


Sunday, August 24, 2014

Some more pictures of the Nebulon B.  The initial painting is done.  Next will come the hyper-detailing:


Friday, August 22, 2014

Just got my Nebulon B from Shapeways.  I am going to use it for X-Wing Miniatures (using house rules) and for the Star Wars RPG I run.

Photo's of the unpainted model below.  I will post more when she is painted:


Saturday, August 16, 2014

FFG has also announced a third faction for their X-WING Miniatures Game at GEN CON: Scum and Villainy. 

It looks like the Firespray-31 (AKA Slave-1) will be getting a new (and meaner) version of Boba Fett.

Additionally, it looks like there will be a new Firespray-31 Pilot: Emon Azzameen (from the X-WING ALLIANCE Computer game) and a new Title Card: the ANDRASTA (Emon Azzameen's Firespray-31)

Guess I will need to customize one of my Firesprays to have Emon's paint scheme:

Wednesday, August 13, 2014

Since FFG has announced Star Wars Armada, I guess I won't be submitting these to FFG as a suggestion for a Star Wars Capital Ship Game:


I tried to put everything needed to play on the Ship Display Sheets (SDS).

The differences between STAR WARS FLEET COMMANDER and X-WING are detailed below:

Play Area is a 4' x 8' Table.  4' x 6' also works.

Each Ship has a SDS.  The SDS details the Type (Capital, Medium, Fighter), HULL, Weapons, Shields, etc., of the Ship.  It also has the COST for Fleet Building.  As a ship takes damage the boxes are marked out.  We usually print the SDS and put it into a page protector.  That way dry-erase markers or grease pencils can be used to record damage and cleaned up easily when a game is completed.

Turn Sequence:
INITIATIVE PHASE
MOVE PHASE
FIRE PHASE
END PHASE


INITIATIVE PHASE
Each turn, the players roll a D6, and the side with the higher roll has initiative.  The player with initiative will move ships after his opponent (allowing him to see where his opponent is moving), and will fire ships first (potentially getting a devastating first strike.)


MOVE PHASE
The Players take turns moving a ship.  The Player who lost the initiative moves first,  The player picks a manuever from his SDS and moves the ship.  The player with initiative then moves a ship. This continues until all ships have been moved.  Unlike X-WING, the template is placed at the side and front of the ships base.  The movement is front of base to front front of base.

Ships make Target Locks during their movement,  They may make Target locks equal to the number of TL Symbols on the SDS.  Target Locks can be made out to Range 6.

After all ships have been moved, the same process is done with Fighter Squadrons.  Fighter Squadrons do not pick a manuever, they just us a range ruler to move up to their maximum speed.  The Figher Squadrons have a 360 degree manuever. They are more manuverable than ships.  Fighters may have 1 TL.

A Fighter Squadron may be placed in base contact with another enemy Squadron to initiate a dogfight.  If a fighter squadron that has not been activated and has been engaged in a dogfight is activated, it can choose to ignore the dogfighting and "Stay on Target".  If it does this, the enemy fighters that are engaged may make an immediate "free" attack.  Casualties are inflicted, and the squadron presses on. The Dogfighting Fighters follow along and may attack a normal attack during the FIRE PHASE.  This allow a bomber group to attempt to press an attack against a ship, but at a serious risk.


FIRE PHASE
Fire is conducted in the opposite order.  The player with initiative picks a ship and fires it's weapons.  The player fires the weapons by choosing a target, determing which weapons are in arc and the range.  The player then rolls Red X-wing Attack Dice based on the range and weapon type.

Each SDS has a Chart that shows what is needed to score a hit based on the target.  Heavy Turbolasers roll more dice than Lasers for example.  Depending on the Type of weapon and Target, hits are scored.

For example, Heavy Turbolasers and Turbolasers hit Capital Ships and Medium Ships on HITS and CRITS, but only hit Fighters on a CRIT (because they have a hard time tracking small, fast targets.)

PDS/PDL (Point Defense Systems/Point Defense Lasers, on the other hands hit Capital Ships on a CRIT and Medium Ships and Fighters on a HIT orCRIT (because they have a hard time penetrating Capitol Ship shields and Armor, but are designed for tracking small, fast targets.)

Each Ship has 4 Firing Arcs (FWD, PORT/LEFT, STARBOARD/RIGHT, AFT).  Each Weapon has a circular symbol on the SDS with which of the 4 Arcs it can fire into shown.  The darkened in portions of the symbol are arcs the weapon cannot be fired into.

After the hits are determined, they are marked on the target ships facing shield.  Once the Shield is down, the damage is applied to the interior of the ship.  Heavy Turbolaser, Turbolasers, PDS/PDL, PROTION TORP, etc, hits are applied to HULL.  ION CANNON hits are applied to WEAPONS, TARGET LOCK, SHIELD GENERATORS, etc.

When a CRIT is rolled on the Red Attack Dice, they inflict 2 hits, and are applied first.  For ships it is straight forward.  Apply 2 damage per CRIT.

When damage is applied against against fighters, the damage is applied against the fighters from leftmost fighter to rightmost.  Damage from CRITS is applied first and any extra damage against an individul fighter is lost (but the fighter explodes in a nice fireball!)

For example, an undamaged TIE Squadron is hit with a CRIT and a HIT. The CRIT is applied first, and vapes a TIE (which only has 1 HULL, so the extra point of damage is lost.)  The HIT is applied against the next TIE, which is also destroyed.

Second example, an damaged X-WING Squadron is hit with 2 CRITS and 3 HITS (good shooting from the TIE INT's.) The first CRIT is applied, and destroys the first X-WING which already had a damage point from a previous turn (only has 1 HULL left of it's 2, so the extra point of damage is lost.)  The second CRIT is applied against the next X-WING, which is also destroyed.  The Next 2 HITS are applied, destroying a third X-WING.  The final HIT is applied against the fourth X-WING and damages it, leaving it with 1 HULL.


Once all of a Ship or Fighters HULL is marked out it is destroyed.


END PHASE
Repairs are conducted.  If the SHIP executed a GREEN Manuever it may repair equal to double it's SHIELD GENERATORS in SHIELD POINTS.  If the SHIP executed a WHITE Manuever it may repair equal to it's SHIELD GENERATORS in SHIELD POINTS.  A RED Manuever means no SHIELD REGENERATION.

That's it in a nutshell.  


Hope you have fun with it.  Let me know how it works for you.

One change my group has been considering is to cut all the HULL, WPN, and SHLD boxes on the SDS in half, so that larger battles wouldn't take as long.  Fighter Squadrons would have only half the Fighters.  SHIELD GEN, HANGER and TARGET LOCK stay the same.